After striking out at the
Electronics Flea Market Saturday, I stopped at
Fry's for a fresh pair of clippers and soldering tips, and picked up a small case too-- a
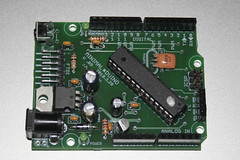
Serpac M4. I used some free protoboard Laen sent me (THANKS!) to build a simple Arduino-compatible circuit to fit inside it, with a single button and IR LED, powered by three
LR44 (AG13, 357, etc.) button cell batteries; basically a
mutetater circuit with one LED instead of four.

Following
Martin Koch's code example, I got the circuit to trigger my
350D's shutter, making it functionally equivalent to a
Canon RC-5 remote control. Using an ATmega168 is overkill though: most pins go unused, and it nearly drained the three LR44 batteries when left on all night.
I figured putting it to sleep would solve the power consumption problem, so I modified the
ArduinoSleepCode example from the
Arduino Playground to make the D2 button both wake it up from sleep and trigger the shutter. It doesn't need to be awake for any time at all really before going into "SLEEP_MODE_PWR_DOWN": the wake up function triggers a shutter release event; currently it sleeps after five seconds. This will be a key feature of the
mutetater and a more complete intervalometer-- using a button or a DS1337 clock alarm to wake up when needed.
Files:
 The ArduPilot Mega by SparkFun ($60) is an extension of the original ArduPilot, but as its name implies, now sports an ATmega1280 as its main processor. Designed to be the brains behind a UAV or radio-controlled flying vehicle, it's all ready to hook up to a GPS receiver, servos, RC I/O, accelerometers and gyros, etc. It's amazing how much is packed in there-- it even has a secondary ATmega328 and multiplexer.
 From Spikenzie Labs, the folks who make the Voice Shield and Altoids tin-sized Prototino comes a "SIP" (Single In-line Package) Arduino-compatible board "Sippino" ($16 kit). It can be mounted vertically or horizontally in a breadboard and has a 6-pin FTDI breakout header for programming, though no power regulation or reset.


