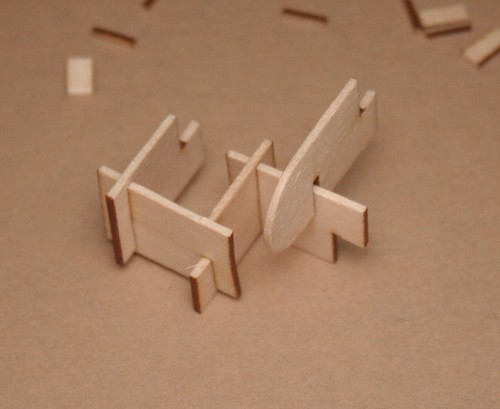
- Cases and case front panels
- Button caps and custom lit buttons
- PCB etching (removing masking paint)
- PCB post-etch scoring and labeling
- PCB solder mask cutting
- Motor mounting and simple gearing (like this?!).
Monday, October 4, 2010
Distracted...
The laser has distracted me from Arduino-based pursuits for the last few weeks in spite of the Uno and Mega 2560 release (and subsequent kerfuffle) and the open source hardware summit and Maker Faire in NYC.
Making a better ventilation and filtration system takes priority since I'll be able to make all sorts of things when I can run the laser whenever I want:
Saturday, September 11, 2010
EPILOG
I replied to a Craigslist post for an old Epilog laser system w/PC, Corel, rotary attachment... complete pipeline.
It's sitting in my office now and it works....:D
More later... much to do...
It's sitting in my office now and it works....:D
More later... much to do...
Thursday, September 9, 2010
Arduino Coffee Control Success!
 This morning, Liz woke up, tapped the bookmarked link on her iPhone, and then tapped "Click Mr. Coffee ON Button." A few minutes later, she went downstairs and was greeted with a fresh, hot pot of coffee :)
The circuit for Mr. Coffee ended up being different from what I'd planned when I got everything assembled for a final test: switching on power to the unit did not start the brewing; it needed to have the "ON" button pressed! So instead of switching power on with a relay, I soldered wires to the "ON" button's sides and ran them to the same relay. I edited the sketch in ten minutes to close the relay for a half second, uploaded it, and it worked perfectly.
Tuesday, September 7, 2010
Coffee Control
 It looks like we'll have remote control of the grinder timer by the end of the week, along with power for Mr. Coffee and the Gaggia Classic!
The first step (mentioned in my previous post) was to get my old (V1.0) Adafruit Ethernet Shield up and running with an XPort Direct+ and the color picker sketch on the examples page. Then I stripped down the sketch, reconfiguring it for general pin control: toggle outputs, set PWM output values, pulse, and read analog values. After that, I simplified it for the coffee control project which only needs three digital output pins.
One obstacle was getting my LAN to the kitchen counter, and an old AirPort Extreme from my scrap bin (found on the street!) did the trick: it now wirelessly bridges our home network via WDS and connects to the ethernet shield with a cable, its USB port powering my minimal Arduino-compatible board underneath with enough 5V power to spare for Mr. Coffee's relay; I'll add a 12V source for a bigger, higher power relay to switch the Gaggia Classic.
The Arduino side of the system works great, serving a web form (at right) to turn the two power relays on or off and to trigger the grinder timer. The last part is always the hardest, though: wiring and casing it all up. Safe wiring will take some time to nail down, with Mr. Coffee needing ~1025W and the Gaggia Classic rated at 1370W (!). As for the case itself, lucky for me some folks from Ponoko are scheduled to make a presentation tomorrow (er, later today ;) at the Make:SF Meetup-- just the info I need, right when I need it!
Tuesday, August 17, 2010
Workshop!
After over a month of planning, boxing, and finally moving into a new home, I'm ready to get back to projects working in a dedicated workshop/office space!
Arduino-based projects, all within reach:
Arduino-based projects, all within reach:
- Mutetater: get it working for the Sharp TV I have, at least. This is more a challenge of IR encoding/decoding than anything else, so I'll reel back my code and try to re-approach the examples I've looked through before.
- Resurrect Growduino for an herb garden on the upper desk, easy since there are power outlets available so I can sidestep solar power issues for now and get stuff growing.
- Net-enabled coffee grinder timer so it can be controlled through a simple web interface, via an iPhone on the local network. I think it would mostly involve working with the ethernet shield, then maybe "shield-ifying" the grinder timer or building ethernet capability into the single-PCB circuit. Then I can start building out a control system for the Gaggia Classic.
- Remote-controlled curtain system for the TV. Mostly involving IR decoding, simple (MOSFET) motor control, some limit switches, mounting hardware, and sewing.
- PPAC: um, why aren't the relays firing?! Buttons work, so I need to disassemble it and check the output pins, then position the "pea" for exciting wake-up sequences.
- Intervalometer ("intervalomejar"?): get a simple one working for timelapse using the FSM (Finite State Machine, not Flying Spaghetti Monster) library.
- PID for temperature and motor control
- Temperature sensing for PID control: thermocouples
Saturday, July 10, 2010
More Boards...
Seems like I'm always finding more Arduino-compatible boards to add to the spreadsheet-- added four today, bringing the current count to 89. I remove some occasionally when I check and find the links are no good, but hopefully all of the listed boards really are available, or will be very soon.
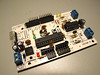
 Added today are Duemilanove and Mega clones from DF Robot, a Chinese company, as well as their Romeo robotics board (pictured, $36) which is essentially a Duemilanove with the SMD ATmega328's 2 extra analog pins exposed (Seeeduino style), male header pins, on-board buttons, I2C headers, and an L298 motor driver with screw terminals.
 Also added is the Displayduino (pictured, $70, which I noticed at Sparkfun), the core of the MondoMatrix modular system for controlling large numbers of LEDs or servos or whatever. Displayduino acts like a Sanguino with USB, screw terminals, and an RS485 port driver for communication in addition to the ATmega644's two UARTs.
Added today are Duemilanove and Mega clones from DF Robot, a Chinese company, as well as their Romeo robotics board (pictured, $36) which is essentially a Duemilanove with the SMD ATmega328's 2 extra analog pins exposed (Seeeduino style), male header pins, on-board buttons, I2C headers, and an L298 motor driver with screw terminals.Also added is the Displayduino (pictured, $70, which I noticed at Sparkfun), the core of the MondoMatrix modular system for controlling large numbers of LEDs or servos or whatever. Displayduino acts like a Sanguino with USB, screw terminals, and an RS485 port driver for communication in addition to the ATmega644's two UARTs.
Wednesday, June 23, 2010
EMSL "Diavolino"!
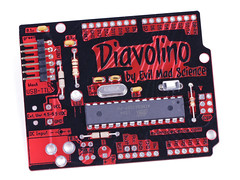 Windell from Evil Mad Scientist Laboratories ("EMSL") announced a new Arduino-compatible board today: Diavolino!
Designed to be programmed with an FTDI USB cable (6-pin), the awesome-looking $13 kit comes with just enough to get started, including an ATmega328 pre-loaded with the Arduino bootloader. Pin headers cost an extra $1.50, and you can power it with an optional $1 3xAA battery box with switch, which should supply 4.5V (using alkalines).
Very cool kit from some very cool people, and (according to my Arduino-compatible board spreadsheet,) currently the lowest-priced way to get access to the big wide world of Arduino shields.
Update 6/24: Added the EMSL Peggy 2LE and Bulbdial Clock to the spreadsheet, though they're "maybe not" really Arduino-compatible :)
Friday, June 11, 2010
DorkbotPDX PCB Order: Boards and Boards and...
 After missing the May 17 deadline, I was able to get two boards in for the May 31 DorkbotPDX PCB order. That order has taken longer than previous ones though, since the fab house quoted a much higher price than for previous orders. Fortunately, Laen was able to find a different manufacturer for the panel and stick with the $5/square inch (for three boards *shipped*) pricing structure-- woohoo!!
I submitted a 3-digit 7-segment display board (using an SAA1064) and an Arduino-compatible board with curvy traces and optional everything (including 3.3V operation).
The next deadline is this Monday, June 14 at 8AM, so tweak your designs this weekend and get your .brd or gerber files in!!
Friday, May 14, 2010
Rounded EAGLE Routing?
 Trying to spread traces around, I wondered how the rounded wire bend routing options worked in CadSoft EAGLE. There's a free-form, spline sort of wire bend option, and I went around to all the traces on the latest minimalduino version (which needs a better name btw), widening and pushing and pulling traces to try to fill empty areas. Sort of looks hand-drawn, kind of hippyish. I was hoping to find a way to eliminate one of the jumper wires, but no luck. I introduced an air-wire, actually, but can fix that with a little nudging.
 Not sure whether to get a few of the rounded or "normal" versions when the DorkbotPDX PCB order is due. I got the idea trying to arrange the traces in the lower left and upper middle areas, after working in some patterning in the diagonals. Your opinions are most welcome!
Update 5/21/10: The mail to Laen at DorkbotPDX never sent?! Went to mail him asking him if they worked out, and the mail was in "Drafts". Stayed up late Sunday night tweaking them and... crap! Guess I'll have to wait for the next order; had a 3-digit 7-segment display board too, based on an SAA1064..:(
Thursday, April 29, 2010
More *duinos
Two new Arduino-compatible boards are out and are now listed in my big spreadsheet of boards.
 The ArduPilot Mega by SparkFun ($60) is an extension of the original ArduPilot, but as its name implies, now sports an ATmega1280 as its main processor. Designed to be the brains behind a UAV or radio-controlled flying vehicle, it's all ready to hook up to a GPS receiver, servos, RC I/O, accelerometers and gyros, etc. It's amazing how much is packed in there-- it even has a secondary ATmega328 and multiplexer.
 From Spikenzie Labs, the folks who make the Voice Shield and Altoids tin-sized Prototino comes a "SIP" (Single In-line Package) Arduino-compatible board "Sippino" ($16 kit). It can be mounted vertically or horizontally in a breadboard and has a 6-pin FTDI breakout header for programming, though no power regulation or reset.
The ArduPilot Mega by SparkFun ($60) is an extension of the original ArduPilot, but as its name implies, now sports an ATmega1280 as its main processor. Designed to be the brains behind a UAV or radio-controlled flying vehicle, it's all ready to hook up to a GPS receiver, servos, RC I/O, accelerometers and gyros, etc. It's amazing how much is packed in there-- it even has a secondary ATmega328 and multiplexer.From Spikenzie Labs, the folks who make the Voice Shield and Altoids tin-sized Prototino comes a "SIP" (Single In-line Package) Arduino-compatible board "Sippino" ($16 kit). It can be mounted vertically or horizontally in a breadboard and has a 6-pin FTDI breakout header for programming, though no power regulation or reset.
Thursday, April 15, 2010
Canon IR Remote Control
 After striking out at the Electronics Flea Market Saturday, I stopped at Fry's for a fresh pair of clippers and soldering tips, and picked up a small case too-- a Serpac M4. I used some free protoboard Laen sent me (THANKS!) to build a simple Arduino-compatible circuit to fit inside it, with a single button and IR LED, powered by three LR44 (AG13, 357, etc.) button cell batteries; basically a mutetater circuit with one LED instead of four.
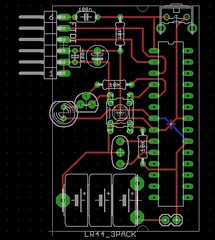 Following Martin Koch's code example, I got the circuit to trigger my 350D's shutter, making it functionally equivalent to a Canon RC-5 remote control. Using an ATmega168 is overkill though: most pins go unused, and it nearly drained the three LR44 batteries when left on all night.
I figured putting it to sleep would solve the power consumption problem, so I modified the ArduinoSleepCode example from the Arduino Playground to make the D2 button both wake it up from sleep and trigger the shutter. It doesn't need to be awake for any time at all really before going into "SLEEP_MODE_PWR_DOWN": the wake up function triggers a shutter release event; currently it sleeps after five seconds. This will be a key feature of the mutetater and a more complete intervalometer-- using a button or a DS1337 clock alarm to wake up when needed.
Files:
Thursday, April 8, 2010
Minimalduino v.89 Delivered
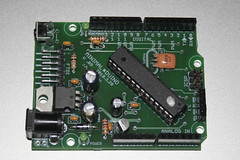 Three copies of my latest Minimalduino design (V .89) arrived today, fabricated in the DorkbotPDX circuit board order. I built one with all components and it works perfectly, with the exception of the 3.3V regulator having a different pinout than the 75LXX part I used in Eagle-- oops...
A SparkFun protoshield and Adafruit motor shield fit on top fine, but with very little (read: "zero") clearance over the tall capacitors I used-- they'll get some tape on top, and the next revision will use shorter caps or orient them sideways. Excited to work with my first factory-made board, I shot and posted some build pictures with a few notes.
To correct in the next revision:
- Fix 3.3V regulator (MCP1700-330) pinout,
- Lay out for wider/shorter or horizontal voltage regulator caps for better shield vertical clearance.
- 5V/3.3V switchable with a jumper on three pins (though it will limit power),
- Top pad and through holes under 7805 for better heat dissipation,
- Credits (CC, author names) on bottom silk screen,
- Optional resettable fuse?
- Optional on/off switch or jumper pins?
- Try to reduce the number and length of jumpers.
Wednesday, March 31, 2010
New(ish) "Official" Arduinos
 The Arduino FIO, announced at the New York Uno Punto Zero meeting, is Shigeru Kobayashi's Funnel I/O board, now officially in the Arduino stable, manufactured and sold by SparkFun Electronics ($25). It runs at 3.3V, at 8MHz, and includes voltage regulation, a LiPo charging chip, and an XBee socket. Note that the USB connector is only for power, not for programming.
 The Arduino Nano 3.0 by Gravitech ($35) got a lot of press in the last week after being stocked in the Make: Magazine Maker Shed (though it was actually rolled out in July). This revision has LEDs for power, RX, TX, and D13; auto power sensing; power regulation and USB programming interface-- pretty much everything a full-sized Arduino has, plus the two extra analog input pins available on the smd ATmega328.
Both are listed on my comprehensive Arduino-compatible boards spreadsheet. I find it interesting that neither of these conforms to the original Arduino form factor, which makes sense given how little space smd components occupy and how often auxiliary circuits are built on solderless breadboards. Still, breadboard tinkerers miss out on the awesome functionality built into shields, which was the motivation behind the Minimalduino board.
Monday, March 29, 2010
Minimalduino: Three, Please!
 I got the latest version (.89) of my Minimalduino board to Laen at DorkbotPDX before the deadline this morning-- looking forward to getting three copies of it!
I met all of the specs I laid out in my original post, except there are no TX/RX LEDs and no SPI header. Keeping it exactly the same size as the Diecimila/Duemilanove meant more (and longer) jumpers than I wanted, but I like the layout over all, and the jumpers won't matter for the DorkbotPDX order since those will be 2-sided boards.
My favorite features are the button type options (top or side), power connection options (barrel or screw terminals, plus .1" separated pins), I2C header, and extra standoff mount-- the three Diecimila/Duemilanove standoff mounts never seemed adequate to me.
Friday, March 19, 2010
Motoruino
 Guilherme Martins announced his fantastic "Motoruino" (flickr set) freeduino board on March 9. It has a shield-compatible pin layout, power pins for each Arduino pin, and a L293D motor driver circuit on the right side. I like that he didn't bind the driver to any particular Arduino pins and included three ways to attach motors' leads. I can't wait to get my hands on one.
Tuesday, March 16, 2010
PPAC Fixes, Minimalduino, Timer
I've been busy lately and haven't had as much time as I'd like to tinker, but I've gotten things moving in the last two weeks and am overdue to post.
 Hoping to show off the alarm clock a little, I brought the PPAC (including power block, valve tree, and tank) to the Make:SF Meetup last month, and while talking and hooking it up at the same time, plugged the AC supply into the DC power socket! The voltage regulator fizzled but the power board seems fine otherwise. Strangely, of all things, the LCD display was dead as well... though I may have killed it when disassembling the can..:o I ordered a better looking LCD replacement which I'll install in the next few days-- green-on-black instead of black-on-green: Newhaven NHD-0216K1Z-NSPG-FBW-L.
 The minimalduino project is still moving forward: I'm using a test board I made at home a few weeks ago, populated with as little as possible: chip, caps, resonator, female headers, reset and male FTDI header. I'll move a few traces around but it's pretty much there, and hope to get three test boards made through the DorkbotPDX PCB order, deadline noon on March 29. I've built a spreadsheet with costs, and it seems like I could make a batch of 25 kits at just under $15 each. I'm not sure if it's worth the trouble though.
 A few weeks ago, I built a new coffee grinder timer with a re-worked sketch and single board, then handed it off to fellow coffee fiend HF for ideas on how to make the ideal grinder timer. One thing we agreed on is that tenths of a second would be cool, so last night I had a great time working out a sketch to drive a common anode 3-digit 7-segment display using an SAA1064 IC. Of course having a sketch to start with made things straightforward-- thanks Alessandro Saporetti! I reworked the code to make it more general purpose, using all of the chip's functions including multiplexed (versus not) and changing the constant current output (7 output levels possible, from 3 to 21mA). [Video to come]
Hoping to show off the alarm clock a little, I brought the PPAC (including power block, valve tree, and tank) to the Make:SF Meetup last month, and while talking and hooking it up at the same time, plugged the AC supply into the DC power socket! The voltage regulator fizzled but the power board seems fine otherwise. Strangely, of all things, the LCD display was dead as well... though I may have killed it when disassembling the can..:o I ordered a better looking LCD replacement which I'll install in the next few days-- green-on-black instead of black-on-green: Newhaven NHD-0216K1Z-NSPG-FBW-L. The minimalduino project is still moving forward: I'm using a test board I made at home a few weeks ago, populated with as little as possible: chip, caps, resonator, female headers, reset and male FTDI header. I'll move a few traces around but it's pretty much there, and hope to get three test boards made through the DorkbotPDX PCB order, deadline noon on March 29. I've built a spreadsheet with costs, and it seems like I could make a batch of 25 kits at just under $15 each. I'm not sure if it's worth the trouble though.A few weeks ago, I built a new coffee grinder timer with a re-worked sketch and single board, then handed it off to fellow coffee fiend HF for ideas on how to make the ideal grinder timer. One thing we agreed on is that tenths of a second would be cool, so last night I had a great time working out a sketch to drive a common anode 3-digit 7-segment display using an SAA1064 IC. Of course having a sketch to start with made things straightforward-- thanks Alessandro Saporetti! I reworked the code to make it more general purpose, using all of the chip's functions including multiplexed (versus not) and changing the constant current output (7 output levels possible, from 3 to 21mA). [Video to come]
Sunday, January 3, 2010
100K Views!
The PPAC "Inflation" YouTube video had its 100,000th view today-- wow! Thanks, viewers!! The big spike happened on December 14 when it started showing up on my favorite blogs, and it has been getting >1000 views a day since then.
Here it is again:
Also, the first "ejection" video:
- Make: Online: "Inflation alarm clock pretty much rules out snoozing "
- Gizmodo: "'Princess and the Pea' Alarm Clock Makes It Impossible to Stay in Bed"
- Hackaday: "Clocks that only a geek could love"
- Neatorama: "Inflating Alarm Clock Pushes You Out Of Bed When It's Time To Get Up"
- The Daily What: "Alarm Clock of the Day"
Here it is again:
Also, the first "ejection" video:
Minimal*duino
 I reworked the one-layer board to got everything routed nicely in two layers, and etched it last night with the layers very well aligned! Now to get flux-- without it, the vias need their own little lead, which is quite a pain. I'll build it out today and test it, then look at board house prices for making a minimal order, seeing how many I'd have to order to get the price down to $10/kit (with no extras). I wonder about rebuilding it in KiCad though-- I've about had it with EAGLE's inefficient UI.
Mute-tater lives!
 I've been working on the mutetater program and board, and have it mostly sorted out, including the bulk of the mounting details.
I etched a small 1-sided board to hold my old Arduino Mini, with transistors rigged like the TV-B-Gone v1.2, and headers for four LEDs, a button, ftdi programming cable, and 5V power. I'm using a Bodhilabs "VPack" with a single cr2032 to get 5V, and its header works nicely for mounting a power switch. It all fits in the foam potato, so now to figure out the button and LED mounting.
I've been working on the mutetater program and board, and have it mostly sorted out, including the bulk of the mounting details.
I etched a small 1-sided board to hold my old Arduino Mini, with transistors rigged like the TV-B-Gone v1.2, and headers for four LEDs, a button, ftdi programming cable, and 5V power. I'm using a Bodhilabs "VPack" with a single cr2032 to get 5V, and its header works nicely for mounting a power switch. It all fits in the foam potato, so now to figure out the button and LED mounting.
Subscribe to:
Posts (Atom)
